

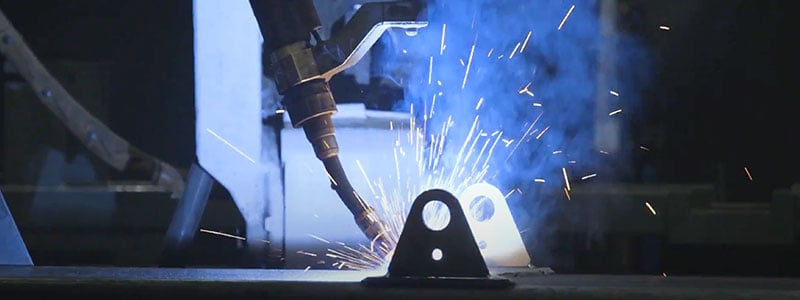
Robotic welding is all about time and minimizing the loss of it. Everything from porosity, microarcing, and spattering contributes to an inefficient welding process that requires troubleshooting and problem solving.
Arc start failures fall right into that category of process optimization.
Whether it's the arc failing mid-weld or faulting at the start of a new weld, you can point to a few common culprits causing this issue to arise. The degree of difficulty to identify and correct these issues will vary, but let's detail what causes these arc start failures and then dive into each one and some ways to overcome the problem - and how optimizing can lead to big gains down the line.
How Do Arc Start Failures Happen?
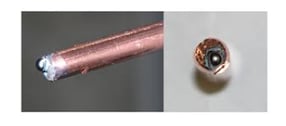
The number one cause of arc failures in my experience is having bad parameter sets tied to your arc end. If your wire is not in a good physical state at the end of the last weld, then when you go to start your new weld you have conductivity problems, stick problems, and your weld arc has a failure to launch.
Any kind of major balling on the end of the wire due to bad arc end parameters will cause conductivity issues. This ball not only increases the overall surface area of the wire, thus causing a loss in current density to support the start of the arc, but it can cause a wandering of current - further degrading the potential for clean arc starts.
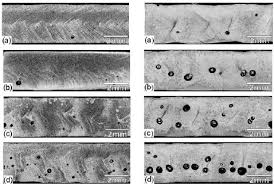
In addition, the solidification process of the wire end at the completion of the weld can lead to other issues. To understand how the ball at the end makes a huge difference is realizing the physics of what happens. Metal comes from the earth, containing various things such as ore, sand, and dirt. Silica content is part of this and while often added to melts to make wire improve wetting of the puddle, it can leave islands in the weld and at the end of the wire. What happens when welding is that metal will solidify before the silica (glass like substance). As the metal solidifies at the end of the wire, it will typically do so before the silica leaving a fine layer of "glass" on the bottom of the ball at the end of the wire. This in turn provides insulation against electrical flow between the wire and the parts welded.
Silica Formations on the Wire End
 Glass is an insulator, electricity cannot pass through it. This tiny little bead of glass is standing between your part and the welding torch trying to shoot 500 amps of energy to it. Sometimes the glass will break and you will succeed, but that's what happens when you hear that constant cracking and popping sound from the welding torch. That is often from the glass breaking or the arc trying to jump around at them.
That phenomenon is very difficult for robotic technicians to plan for or identify.
If you do get silica build-up on the end of the wire, you want that build-up to be so minimal that when you do fire the arc the next time, it shatters instantly and does not cause the arc to fail. In order to fix that, most of the time, you will increase the voltage on your arc end parameters to provide a little more potential to burn off the end of the wire. You want that wire to have more of a needle like appearance after each weld, as this shape will aid in ensuring the next weld will have a good chance at a clean start. Just by doing that and getting rid of microarcing inside the tip, that will save your robotic welding operation hundreds, possibly thousands of hours in downtime per year.
That's not an exaggeration, either. Every time you have a wire stick fault or you have to go into that robot cell for anything, you are typically causing a minimum of five minutes of downtime. Now if you are doing that 15 times a day on 20 robots, those small maintenance setbacks add up to significant drivers of cost on the automation side and drag down the bottom line of production.
It's a matter of optimizing your robotic welding process. Just go through and look at what are the little reasons why you are experiencing downtime and fix them. Those small steps end up saving thousands of dollars a year by simply taking the time to dive into the details of your problems and optimizing your process for speed and efficiency. All without adding new equipment.
It's better to spend two hours figuring it out than losing thousands needlessly over the year.
Silica Formation on the Weld
You will also need to be cautious of where you start your weld to avoid arc faults.
Are you starting a weld on the crater of an older weld? If you are, you need to be looking for that same glass formation or the silica island in the crater of the weld where you're trying to start.
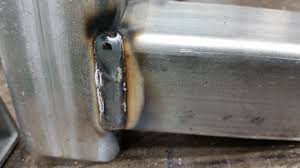 Just like with the ball, that silica formation on the weld is an insulator. This is a common thing to see on top of welds, especially if you're using a cored wire or if you're welding dirty material. Silica has another benefit in that it helps pull impurities out of that weld, specifically those relating to coatings, oil left on the part, dirty parts, etc.
Silica by nature does not form solid before the liquid metal does; therefore, impurities float to the top. This creates glass islands on your weld, which is a good thing because you're seeing the impurities being pulled out of your weld material and sitting on top where you'd want them instead of within the weld itself. When they are down inside the weld, this can cause inclusion or stress risers, which can affect your weld quality. That is another physical observation you want to be aware of.
Again, it's a matter of voltage adjustment and programming to account for that. You want to start your weld and make good contact/continuity every time.
Microarcing Causing Arc Faults
If it seems like microarcing comes up as a reason for any process failure, that's because it does. Arc faults are not different.
We have a long piece on How to Limit Microarcing I would recommend anyone to read, but in general, microarcing occurs as a result of:
- Lack of cast in the wire
- Outer diameter of the wire is out of specification
- Contact tip inner diameter is out of specification
- Elongated or worn consumables
Does Adding a Ream Cycle Help?
Adding a reaming cycle to the process is another way to deal with arc faults and the silica formation on the end of the wire. If your robot welding cell isn't made for speed and efficiency, it's one of the surest routes to eliminate arc faults. But for high production operations, it usually adds too much cycle time.
Most robot cells ream once every two or three weld cycles, if not less. In cases where you have a really dirty process, more reaming is often necessary, especially in cases where you might have 20+ welds per cycle in a high volume setting. To go back and cut that wire every time after each weld would greatly increase cycle time and fails to make a lot of sense from a productivity standpoint.
Summary
Microarcing is one of the few audible issues you can hear in your welding process. While the silica formations that create arc faults can lead to additional more common problems, be mindful of the small details.
This can include where the robot program starts after a stop or how your voltage can help blast through a silica formation. By doing so, you can increase your robotic process efficiency immensely.
--
