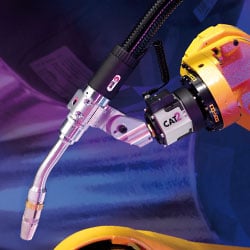
When you are evaluating a new robot welding torch, the ramifications of the testing is huge. Normally for large manufacturing companies, this is putting a solutions on the production for years with a high equipment investment. This makes the need to get great data to use to evaluate the right solution critical.
Other factors like service, support, and part availability all play a factor in the equation, as well. But on the testing side, it's how does the torch perform against it's peers that will drive a large part of the decision.Getting that reliable result can be difficult if you are either unfamiliar or unsure of how to get a truly objective test performed. There are a few components of a robotic welding torch that really test their mettle.
How to Test to Get a Reliable Test Result
Very similar to contact tip testing, you want to try to simulate robotic welding torches under the same conditions. However, with torches, I almost like a lab environment better. And the reason I like a lab environment better is because you can really bring it through the heats because that's really what you're concerned about most for the torch.
The biggest difference between doing lab testing and doing a side by side in production is the latter takes much, much longer. Your testing method might be six months, and one of the biggest drawbacks is you can't see as much stuff because you're running production.

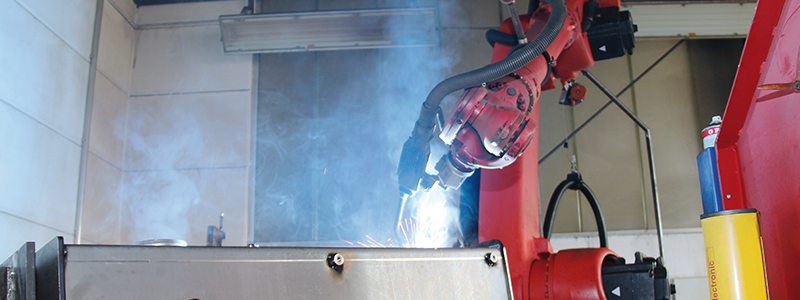
In a lab, you control everything better. Contact tips are far better to test in production than robot torches. Many companies do side-by-sides where they test two different brand torches on a bilateral robot cell or symmetrical robot cell.
This method, however, can produce inconsistent results. The problem is people lose sight of it because you double your data intake while allowing for variables like TCP, tooling, or touchups to influence the test results.
You want to control for as many things as possible, including:
- Robot type
- Power supply
- Wire / WFS
- Parameters
- Tooling
- Part
- Fixtures
- Robot TCP
Doing so ensures an accurate end result and a reliable outcome.
What Should I Test on a Robotic Torch?
The most critical functions to test of a robotic torch are:
- Heat Resistance
- Tool Center Point
- Cable Management
Heat Resistance Testing
Heat is a critical test of the robot torch because it will speak to the torch’s ability to hold up in a production setting. You want to make sure the torch doesn’t hold heat, meaning that heat built up on the torch dissipates quickly during a cool down period. The hotter the torch gets and the longer it holds the heat, the quicker the insulator material inside the neck is will burn out.
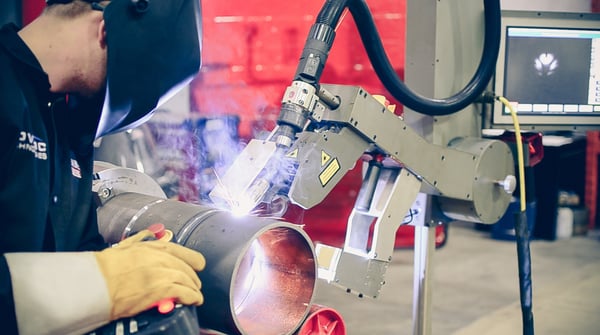
In a lab setting, this would involve setting up long, continuous weld beads and running them as long as possible, test the temperature of the torch, and then accurately test the TCP after you let it cool down and do that across the board.
Also, do impact testing to see what kind of durability the torch has as far as being able to knock it into things and test TCP after that as well and find where and when the breaking point of the torch would be in an impact, where the weakest parts are and compare those.

I like to do tests at 150 amps, 300 amps, 450 amps, and 500 amps and do long heavy duty cycle testing. If you can test in a worst-case scenario, you know what to expect under a production environment.
One of the things that I would do is I would, whether it's an air-cooled or a water cooled, is to take 150 amp tests on a torch, run it for 5 consecutive minutes on a duty cycle, and use an infrared temperature gauge to take three measurements:
- Contact tip
- Nozzle
- Base of the torch neck
With these kinds of measurements, you can compare that data between torches because the more quickly you can dissipate that heat from the torch, the better you're going to be.
The hotter the torch gets, the more malleable it becomes, the more elasticity it gets and the less durable the torch will be in a robot crash.
One thing to be aware of in the robot torch comparison testing is to have a thorough understanding of the gas mix impact on the duty cycle and de-rating of torch performance.
There's a huge difference between 95/5 and CO2. When a robot pushes 500 amps through a 500 amp torch that should be de-rated down to 380 because you're running 95/5 argon.
If you don't de-rate it and understand the principles and the properties behind the thermal dynamics of that torch and the specs that it's made in you're going to get unreliable results from your torch testing.
Make sure you know the gas mix being test on between both torches and know the ratings and de-ratings for each torch based on welding in pulse or with a hotter gas mix.
I've run into so many problems where we're running right on the edge of an air cooled torch 100% CO2 duty cycle rating and then melt torches down or melt tips or diffusers.
The biggest problem we saw when we started overheating the torches were getting massive amounts of spatter stuck to your nozzle, stuck to the tip, etc. So it’s important to document this information to get a true comparison test and come out the other side with a clear result.
Tool Center Point Testing
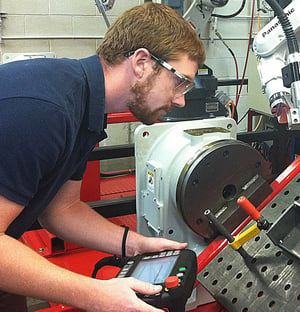
Now, most of the time when we've done crash or TCP repeatability studies with manufacturing companies, we've actually done it with the torch cold because that’s typically the most common scenario when a robot gets crashed – when the robot is in teach mode or immediately following teach session.
The primary reason to do cold testing is it tests for the worst-case scenario. Since the torch gets much more malleable the hotter it gets, the cold test allows for a true apples to apples test of the torch neck durability.
In terms of exactly where you want to crash the neck for testing, I recommend testing at least three to five different points on the torch neck. Start at the contact tip section of the torch neck, and then move your way up the torch to see how it reacts.
How I've done it is always forward in X and always vertically down in beam. And the reason being is nine times out of 10 the people who are going to have a major torch neck crash usually do so going forward or backward because they're trying to get out of the fixture.
/Inbound%20Campaigns/USA/Robotics/E-Book/Robotic-Torches-eBook-Hero.jpg?width=859&name=Robotic-Torches-eBook-Hero.jpg)
The reason you want to do it down into the cell is that down is the one direction a shock sensor clutch does not save your torch. Shock sensors on torches are all in Y and X, they do not protect the in Z; instead, the crash just bottoms out in the spring.
I would do any type of destruction testing and bending under a lab environment where you have torque wrenches and a way to measure hydraulic press pressure so you can physically break or bend them and record the results.
I have had customers actually put robot torch necks on robots and crash them on purpose to test their durability. That is not a recommended practice. Any time you can damage a robot for the sake of testing a torch, it’s not worth the risk to find out given the cost to repair a damaged robot.
The only part of a TCP experiment that you would want to see out on a production floor would be swapping out a different torch neck that says it should have the same TCP. Swap it out on the floor and actually run your path and see if you can still repeat it, you still have a repeatable TCP from your old style torches.
It’s also wise and recommended when testing TCP to check torch necks against what the torch maker says it should be. To do this test, plug in the stated TCP numbers that come with the paperwork – usually it’s part of the drawing, and measure XYZ on the robot to confirm the TCP is true.
You want repeatability in the manufacturer’s product before considering switching over.
Even if it performs great in a heat test or when testing the cable management, if every 3 or every 4 torches are off TCP by a few millimeters, you will spend more time reteaching programs than saving from a longer lasting product.
You should be less alarmed about repeatability between different companies, because chances are high you are always going to be reprogramming with a new torch anyway.
However, when you are replacing that existing new torch with another torch of the same manufacturer, make sure they are the same or you will create more work for yourself than necessary teaching the robot for all the TCP variance.
Cable Continuity Testing
Testing a robot torch cable involves a few different criteria:
- Resistance
- Maintenance Time
- Continuity
Normally, you need to test one cable unless the cable failed prematurely for a reason other than what you are testing. Reason being is that these tests in particular can take a long time to complete. If the robotic welding operation is larger in scale – say 100 or more robots welding on the shop floor, then taking the time to test multiple welding cables is a more recommended route.
Before starting any cable comparison test on a robotic torch, be sure to get a baseline reading on your robotic torch.
Everything has resistance. So how do you know what is good and what’s bad?

It's good common practice to just do it on any torch that you have out in the shop. If it's a brand new torch cable that you are testing, take an ohm reading, write it on there, and make sure it is written in a place where it's not going to get rubbed off. That way you ensure that you have a place to test, and get applicable testing results when comparing cable resistance.
Through-arm Robot Torches
With through-arm robots, the cable management system is straightforward because everything travels through the arm. What I look at in examining this style of torch is how long does it take to change a through arm whip or dress out system.
Some manufacturers are easier than others are. I've had some that were complete nightmare and I've had some that you could just take out a couple of set screws, the whole cable comes off the torch and off the feeder and you put a new one in and done. That is an important consideration in my book and goes a long way into a maintenance aspect – how long are you going to be down changing out the bad whip or power cable.
Over-arm Robot Torches
Over-arm torches are much easier in a maintenance scenario. You have two connections and you're not feeding stuff through an arm channel to connect it in a tight space. The challenge with over arm torches is that they take a lot of torsion on the fifth axis right where the horn comes up out of the torch. This happens from pre-winding robot axis five and doing circle and unwinding movements to complete a weld. You see a lot of cable torsion stress in these locations with over-arm robots.
When you pre-wind an axis five to do a circular weld the cover always rubs against the casting of the robot. This causes the problem is your robot is grounded and if that casing deteriorates, you're going to eventually direct short your welder through the chassis system of the robot and blow it up. You want to be a little careful with that.

Make sure it's good quality whip, make sure it doesn't end with the torch. The torch is from the tip to the feeder, that is important to remember because if your consumables don't last, meaning your whip and our liners and all this other stuff, then what good's the torch, right? So I agree with what Jeff said on that.
One of the very important things about cables is when you have breakdowns, these cables are made out of thousands and thousands of copper strands. When you have a breakdown with cables going back and forth, back and forth, you will see excessive resistance coming through because you're trying to push current from your power supply to your front end. This is why cable continuity is so important to test and measure for when doing a side-by-side comparison on the torch.
When performing comparative testing, I always thermal dynamically test these cables. Going back to our torch lab environment where you're running several amperages for a controlled amount of consecutive minutes, shoot that infrared thermometer at it and see what your reading is. The hotter that cable gets, the faster it is going to break down.
That type of result isn’t always a good thing, however. As a manufacturer, consider your application and your priorities. Some cables use very fine thread wire in them. Those can be good because they are flexible and they take longer to break. However, they build up more heat because there is more resistance. Whereas if you get a whip that's made with thicker strands, a thicker gauge of braiding inside of it, it's not as flexible, but it'll have less resistance and run cooler.
Any company will need to test to find the right balance. But consider your application and be aware of the kind of robotic welding you do. If you're a company that's doing a lot of linear welding, you're probably going to have very minimal whip damage, I would go with a very low resistance, not as flexible cable.
If your welding operation does a lot of circular welding, which is usually smaller, then a more flexible, less resistant cable is worth testing and evaluating. You might build up more heat, but usually your weld duration is less and the torsion is greater. This means having a cable with more fine stranding and greater flexibility is likely preferred.
Conclusion
With any sort of testing head to head on welding products, you want to control everything but what you’re testing for.
Anything you can exert or assign control of, do it. Otherwise, you risk tainting the test.
Robot torch comparison testing is higher stakes than testing a contact tip. If the contact tips do not perform, switching back is not a big investment of time. However, if a torch study doesn’t go properly, you can be stuck with a massive investment that you can’t change back.
Remember to consider the following factors in a robot torch test:
- Get baseline readings for everything you’re testing for
- Test for several scenarios (crash point, amperage, etc.)
- Control as many variables as possible (robot, personnel, parameters, gas, etc.)
Doing so will ensure you get a reliable result that will make a positive impact on your next torch package choice.
Want more on robotic welding? Check out our Definitive Guide to Robotic Welding. This guide goes in-depth on robot torch construction, evaluation criteria, and how to assess your own robot torch setup to ensure you get the most out of your production. No form fills to read... just click and get started.


