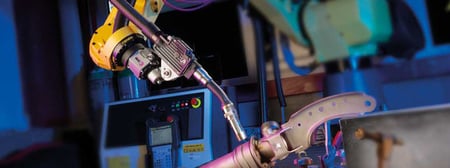
Making the switch from manual to automated welding can be an on-going pros and cons discussion for your facility. Giving control to a robot may be a daunting task for anyone new to this application process, but is a necessary step in getting the most out of your operation. Decreasing production times and taking the load off of your welders may be all you need to go full automation.
Let’s take a look at what it would take for your facility to incorporate automated technology and what you should be taking note of throughout this integration process.
First things first, evaluate the needs of your operation. Automated welding can be extremely beneficial, but does have its limitations. You will want to evaluate two things to get started – How many parts do I produce regularly and how repeatable is my operation? Are you looking to knock out large, timely projects with more robust parts or small one-time parts that you do for a customer once a year? Automation is best at repeating the same parts over and over with reliability and precision. This is not to say that a small shop wouldn’t benefit from having robotic applications, but you would need to consider that your robot can only work as hard as you make it! One of the most important things to consider is weld joint repeatability. Going into the operation, your stampings should be within a tolerance of +/- the diameter of your weld wire on the weld joints. For example, if you are using 0.045 wire than your joint tolerance should never exceed +/- 1.2mm. If this does not happen, you are going to have a really hard time getting your robot to be beneficial to you. When setting up and programming your robot, you will designate its path for each weld. If you put an edge into the fixture, is the robot going to land in the same spot every time? That’s the million-dollar question. If you are not producing product that can be repeated more often than not, robot welding may not be your Hail Mary production advancement. In manufacturing, you will never have a perfect part each time, but can we get the majority of welds to produce something that passes inspection. Your robot will always without question hit the mark on where you programmed it to go, the question is will your parts do the same.
After you have figured out what you are seeking from a robot, you should connect with someone who knows the ins and outs of this application process. This could be a good time to hire someone with robot experience or send one of your workers out to conferences, trainings, and job sites to become an expert. Automated equipment is expensive and not something you want to jump into without understanding its abilities. Robotics are a learning process, just like all new technology, so take your time and do it right before purchasing something that may not work for you. It is imperative that you have someone on-site who can troubleshoot and understand when reprogramming may need complete on your cell.

Now that the prep work is done, you are officially ready to start your automated process. Find an integrator that will help determine which robotic cell to install in your facility and begin the tooling design process. There are several OEM manufacturers who offer a full turn-key cell, including your robot, weld positioner, and fixturing. While the robot will likely improve many areas of your operation, those results are dependent upon the fixture design. This step is essential to the overall productivity advances your facility will gain from installing automated equipment. Take this part of the process slow and be sure you are not over-looking an important design feature that is critical to your welding operation.
At this point, you are ready to get started. Test the robot and make sure it is performing the way you want it to. You will have already invested the money into the equipment at this point, which is why it is important to have a knowledgeable resource on hand to continue helping you through this new process. Automated applications are nice because you can let them do their job while you are working on other things, but at first your robot will require attention as you observe and understand its habits. During this testing period, document what is good and bad. Take note of things you want to change or wish you had done differently when setting up your first cell. This information is crucial to have so that the next time you add a new robot to your operation, you can move forward knowing the benefits and shortcomings that this equipment can bring.
The first step is always the hardest, but can be the start for an improved welding process overall for your facility. Allow yourself at least six months with your first robot welding cell before making any further changes in your operation. This period of time will help you understand what changes occurred in relation to your production process with enough evidence to back up the results. Faster and more reliable production, increased ability for your welders, and continued business growth are all benefits to incorporating automated welding applications. There are plenty of lessons to be learned, you just have to get started.
---


