When it comes to weld inspection, this portion of your weld process is among the most crucial. With a majority of facilities using visual weld inspection methods to pass welds as good or bad, you encounter a major inconsistency issue and run the risk of missing bad welds.
The importance of having a stable weld inspection process is paramount to ensuring high quality components that meet the customer needs are delivered as such. The basis of high quality is built around the foundation of stable processes with robust process windows. That is until variation creeps into the process and parts start to move around in worn fixturing, stamping dies fail to produce clean and stable edges, and machinery breaks in adding incremental bits of change into the process that are inevitable without world class procedures to ensure this doesn’t happen./Blog%20Photos/3D%20Inline/Picture2-png.png?width=376&name=Picture2-png.png) Removing the component of human eyes as your main inspection method will greatly benefit your operation, as there are so many factors that can change the outcome of the weld. While the ability of the human brain to interpret signals and process them at astounding levels is amazing, it often comes down to the topic of attention to detail over long periods of time.
Removing the component of human eyes as your main inspection method will greatly benefit your operation, as there are so many factors that can change the outcome of the weld. While the ability of the human brain to interpret signals and process them at astounding levels is amazing, it often comes down to the topic of attention to detail over long periods of time.
Looking at the same part repeatedly, inspecting for small minute failures and defects lends itself to a sort of complacency or malaise that could lead to various defects “slipping through the cracks.” Even the most qualified of inspectors will not catch 100% of the defect they look for which further opens up the company to risk.
With all of this said, automated weld inspection is increasingly becoming the inspection method of choice as many of these variable issues can be avoided all together.
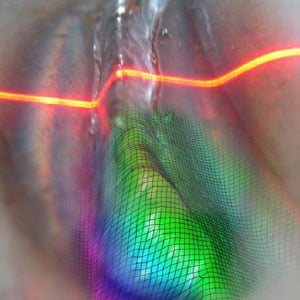
Sensor Based inspection, where laser triangulation is used, works with algorithm-based technology to visualize a weld in a manner that will allow it to be measured against a known good weld. Specific attributes are measured against specifications to determine which facets of the weld meet or don’t meet the stated requirements.
The high-speed scans, objective view on all parts, and definable limits for process related inspection all provide enormous benefits to your operation that should be considered.
3D weld inspection, also known as sensor-based inspection, pertains to a robotic based process, where there is connectivity to other peripheral pieces of equipment such as the sensor controller, robot controller, and manufacturing system’s PLC. The process begins with the sensor controller receiving job and part information from the robot and PLC. The robot in turn moves along the path triggering the sensor in the on condition. The controller then receives intensity and profile images from the sensor. The image is automatically processed and analyzed while being aligned to fit a reference image.
From there, a contour model is calculated wherein the weld borders are detected, weld geometry is measured and defect objects are identified. At this point, items such as weld geometry and detected defect objects are evaluated based on a set of tolerances defined for the weld in question. At this point, the weld is given an OK or NOK decision and the information is sent to the robot and PLC by fieldbus.
Being that this process is completely automated, you can imagine how much this will impact productivity. The process, when set up properly, is 99+% accurate, providing faster inspection times than human inspectors. With the data collection capabilities, it can not only provide historical reference, but guidance as to where your true issues exist. Knowing where to look for improvement is a key benefit, but as the continuous improvement of one’s operation occurs, so does the confidence in the manufacturing process and the boundaries established.
Implementing automated inspection is not necessarily as simple as just setting up the components. It requires the knowledge and support of your team to ensure each attribute is set up properly to compare and check the quality of welds produced in your facility. When you look at the various attributes being measured and defects being inspected for, it can be a difficult process transitioning to automated weld inspection. The process of taking everything that is subjective and objectifying it to hard numbers that are possible to measure against can be difficult, but is completely necessary to have a quality automated weld inspection working for you.
Adding 3D weld inspection to the arena, sets up your process to succeed time after time. The consistency of quality welds and data saving knowledge this welding system can provide is what sets it apart from other weld inspection methods, namely visual inspection.
Interested in learning more? Talk with one of our experts on how to get this set up in your facility today!![]()

